Extending Smart Home Networks with LoRa


For most everyday smart home tasks, such as controlling security cameras, thermostats, motion sensors, or smart plugs, there are plenty of reliable off the shelf solutions. Systems such as Apple HomeKit, Amazon Alexa, and Google Home bring all your devices together into a single hub, giving you an easy to use interface that simplifies home automation. However, they all share one limitation: they rely on Wi Fi, Bluetooth, or similar short range networks.

This works perfectly well inside the house, but problems appear as soon as your devices move further away. If you want to monitor your garage, garden shed, greenhouse, or even check whether the garden gate has been opened, you’ll quickly discover that Wi Fi doesn’t reach reliably over those distances.

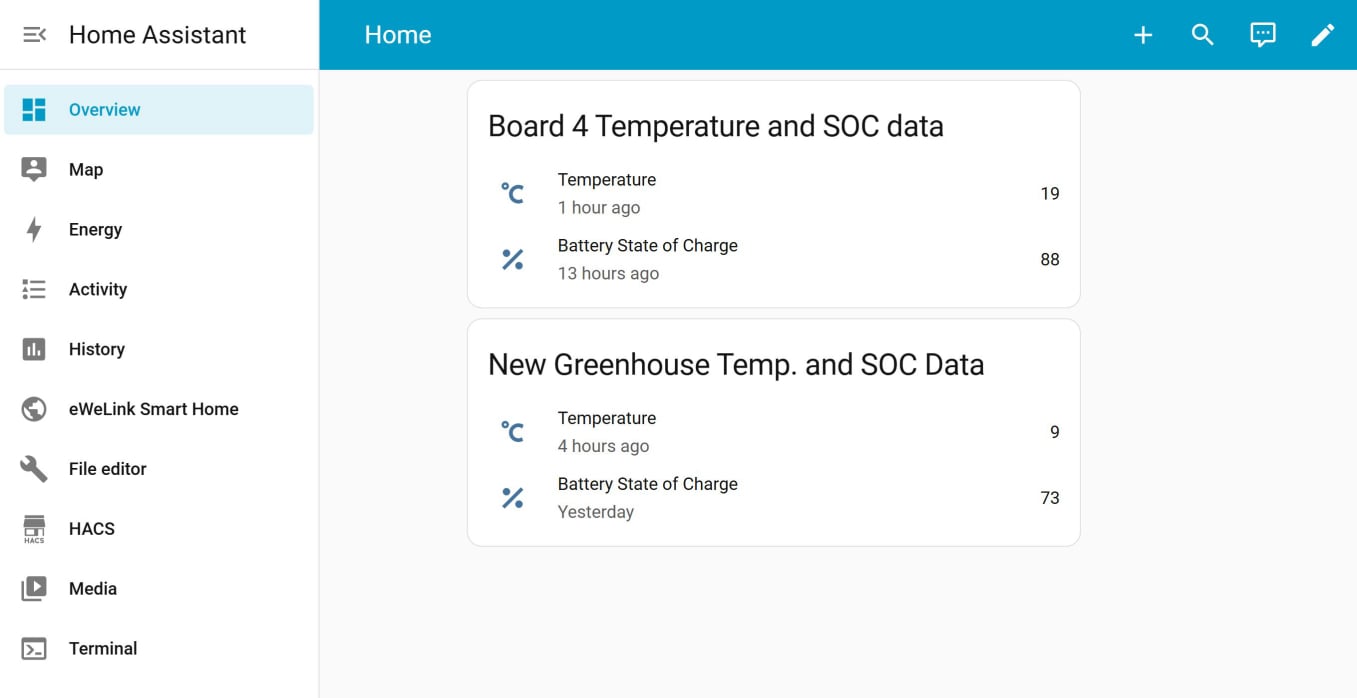
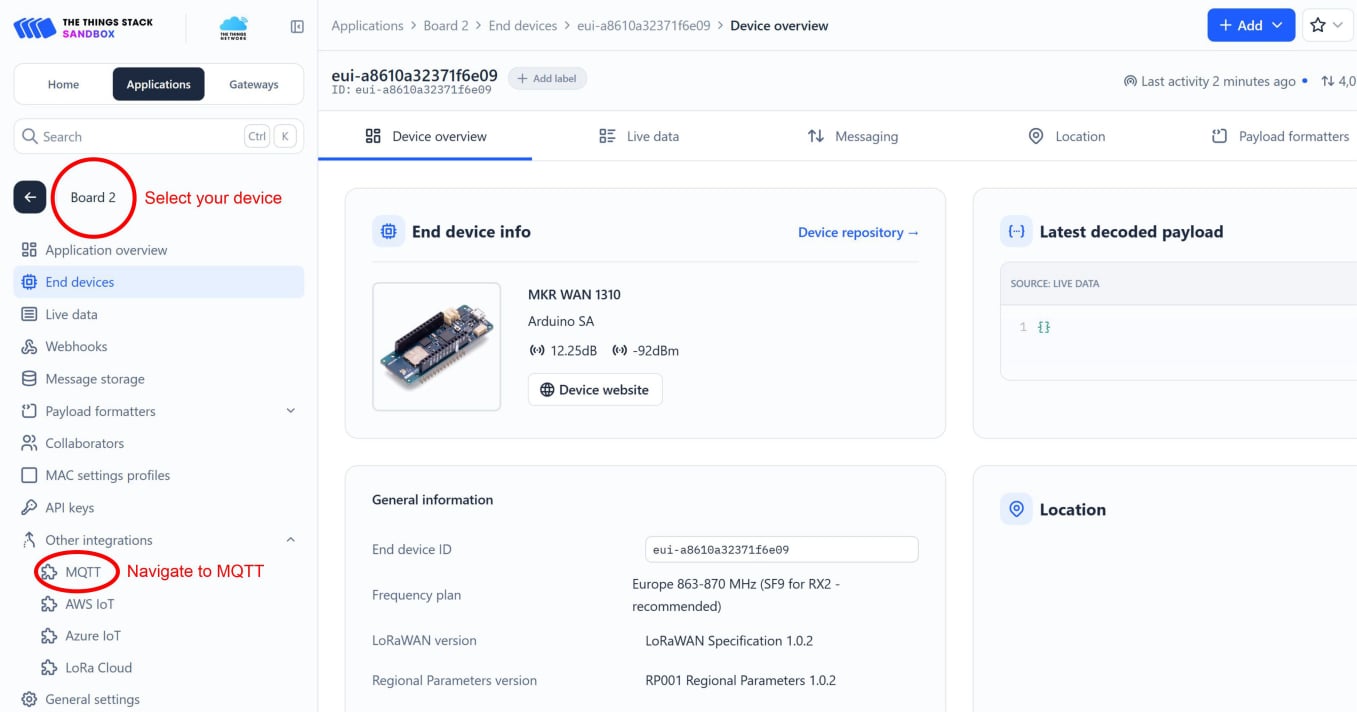
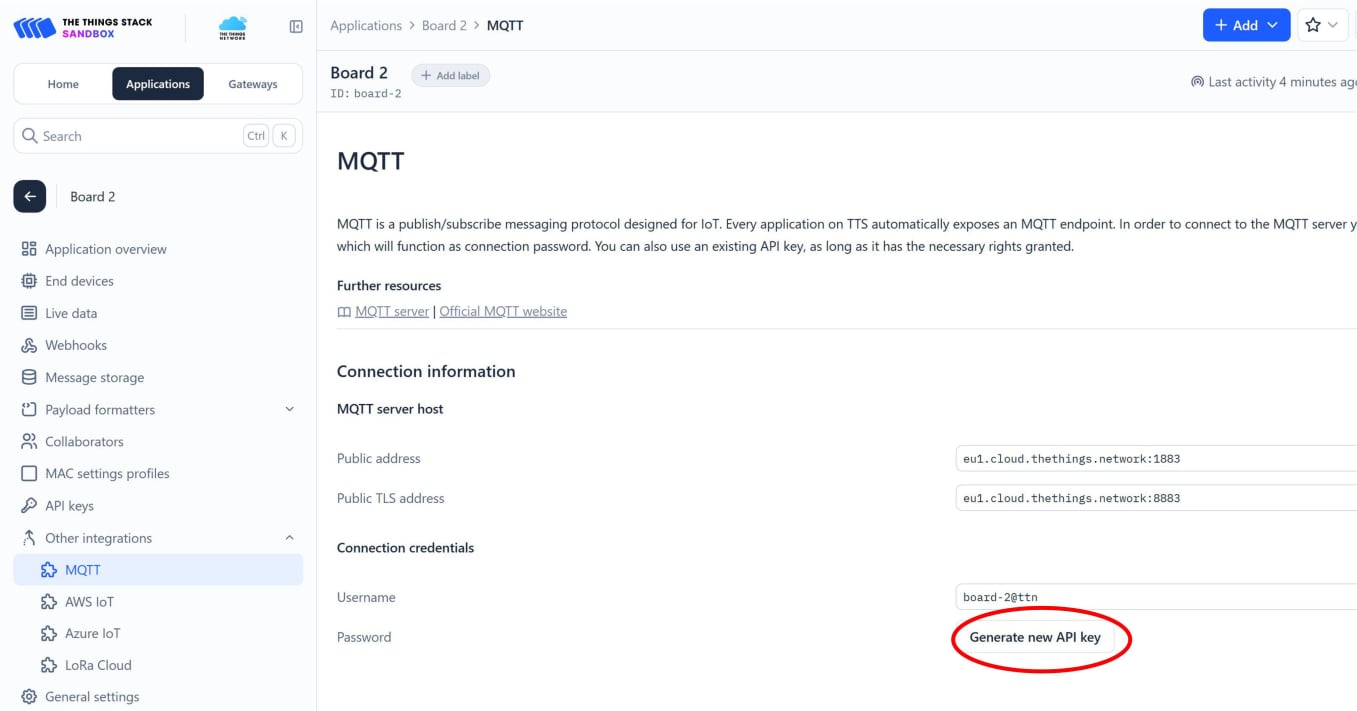
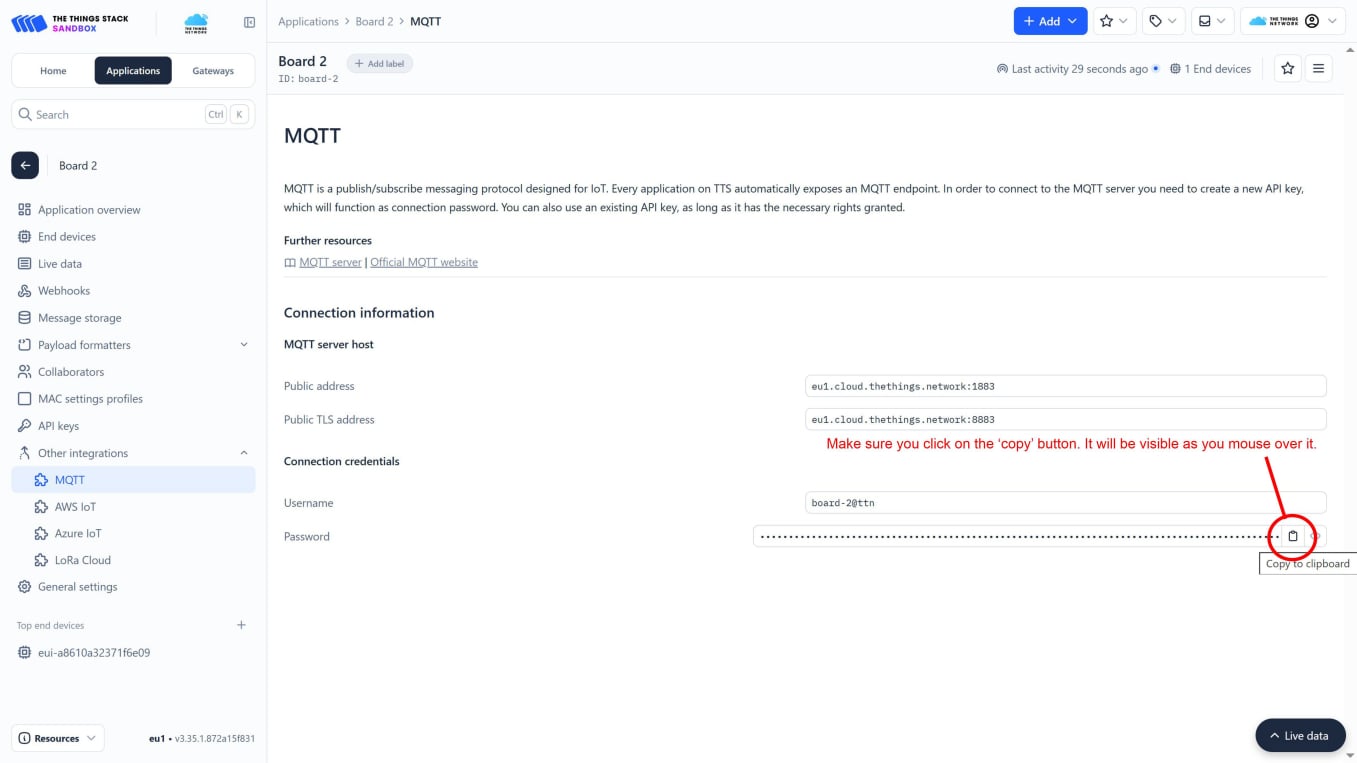
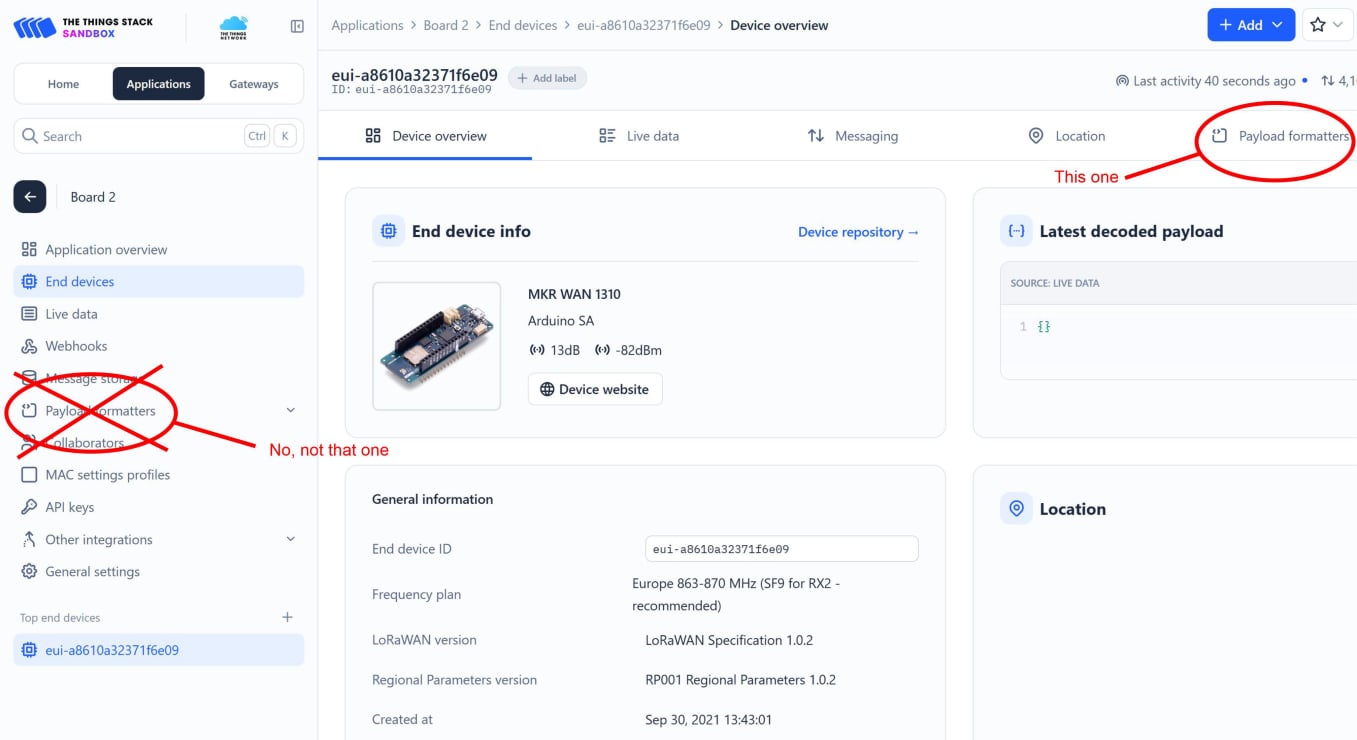
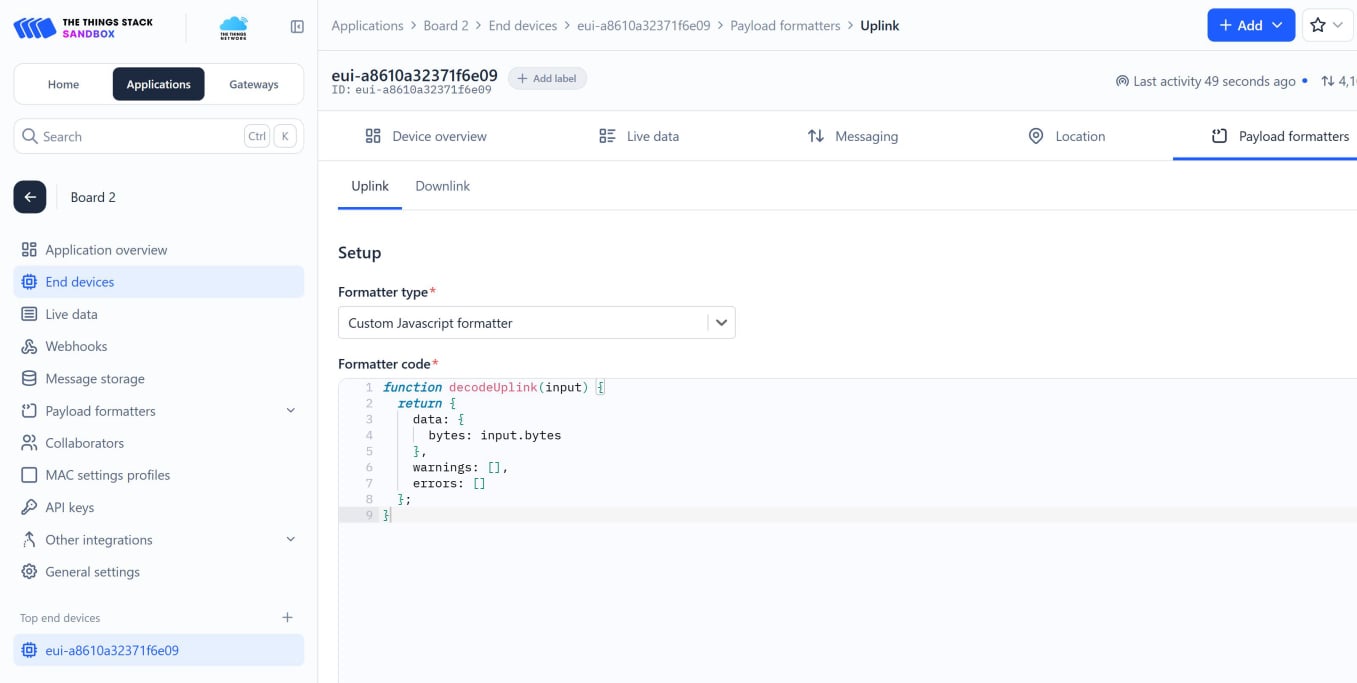
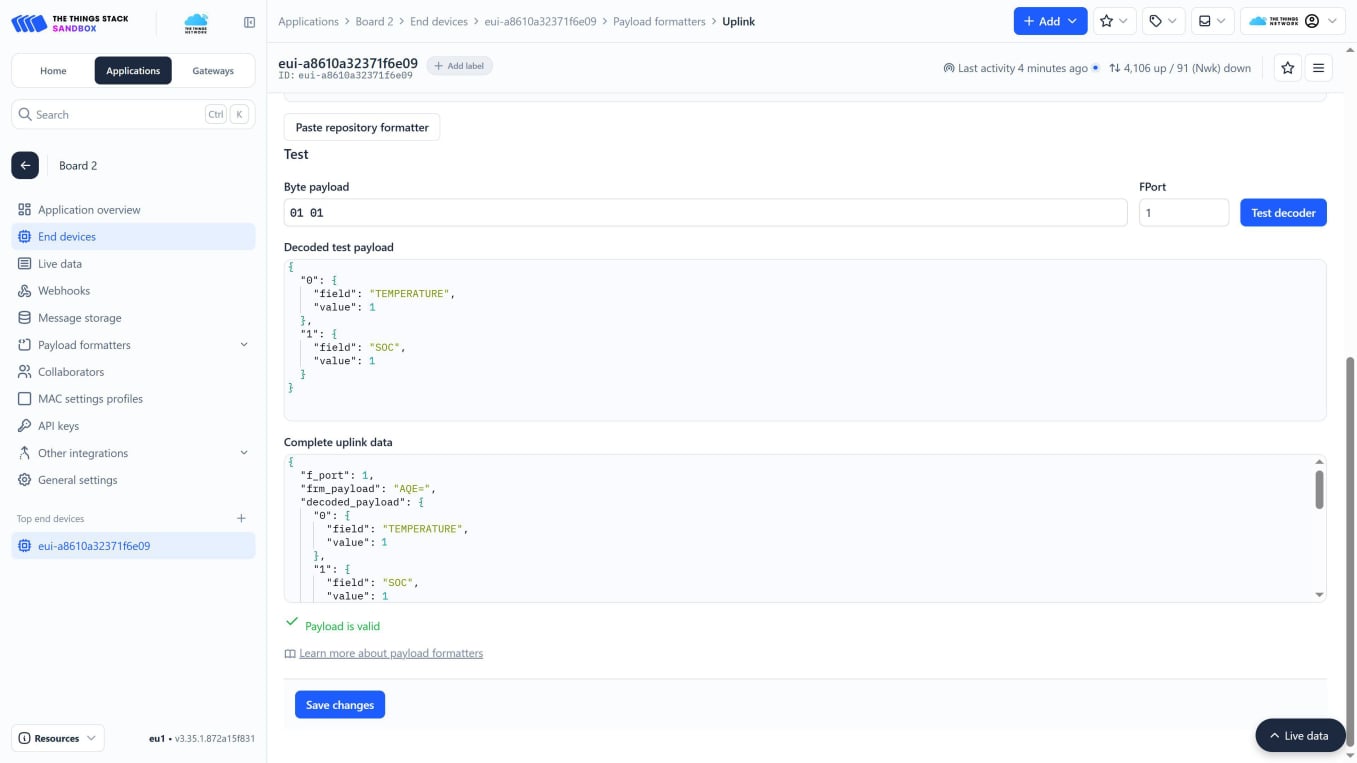
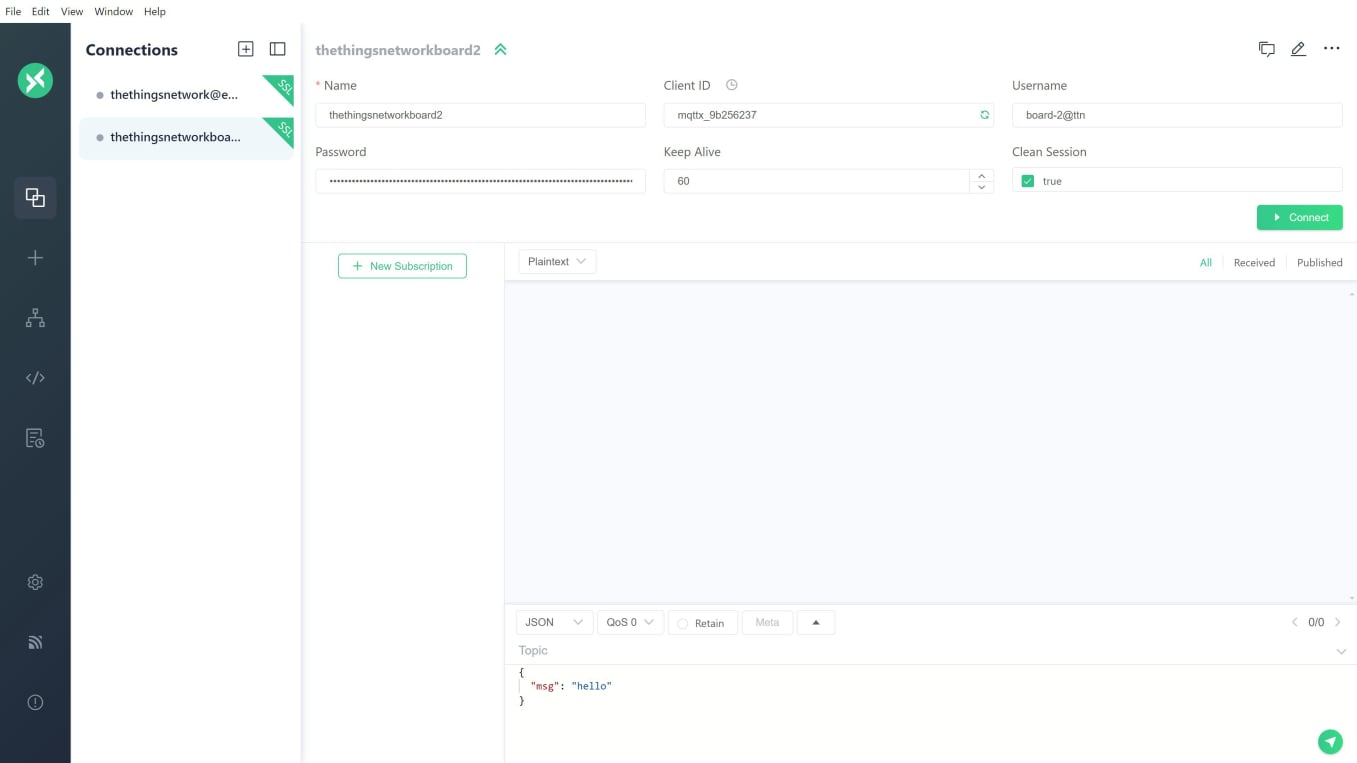
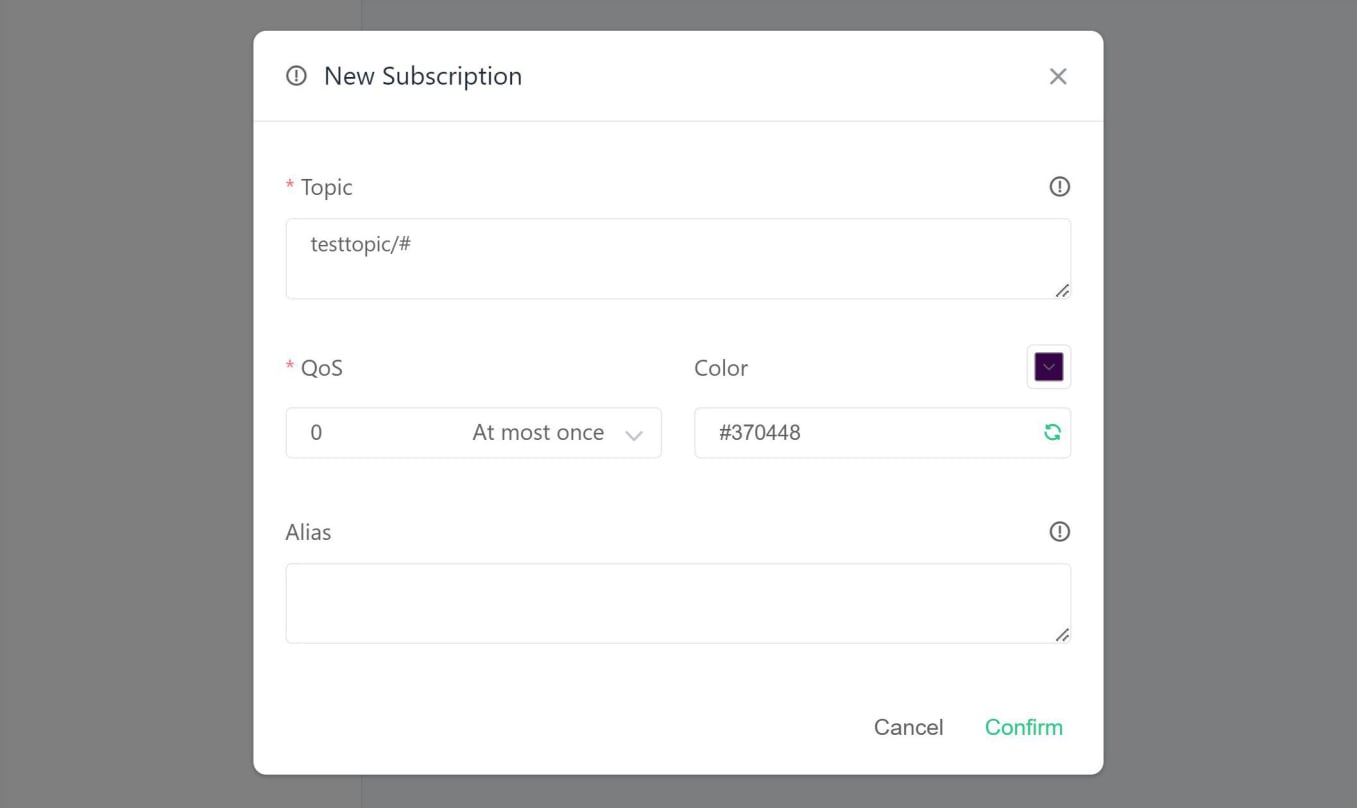
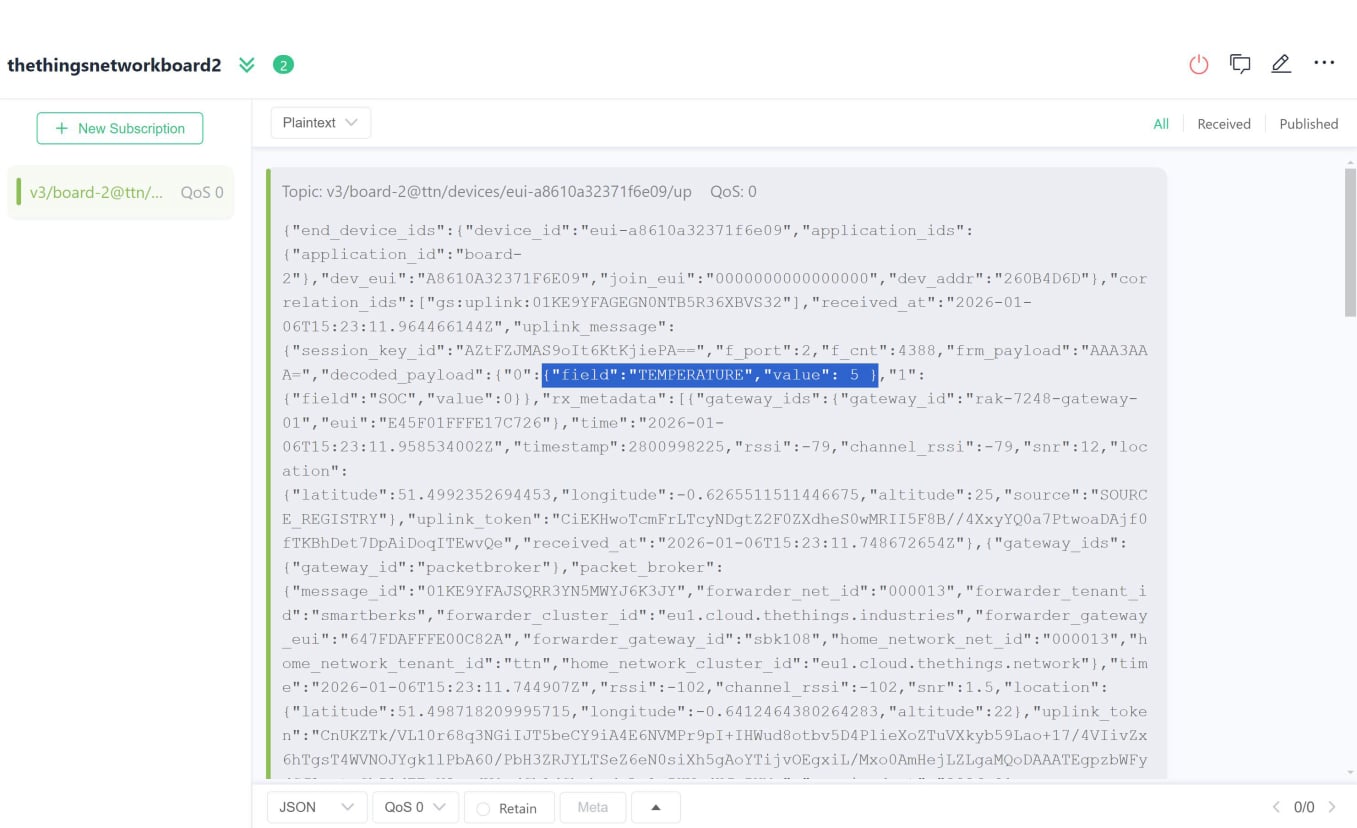
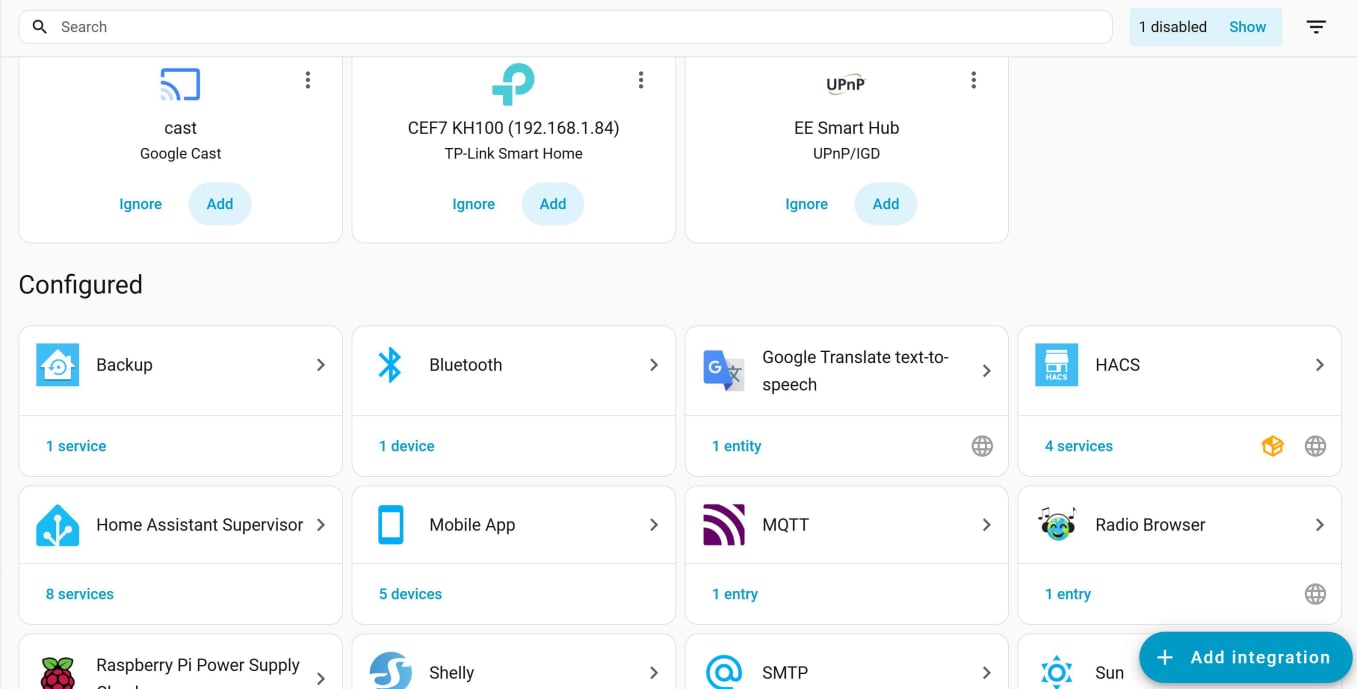
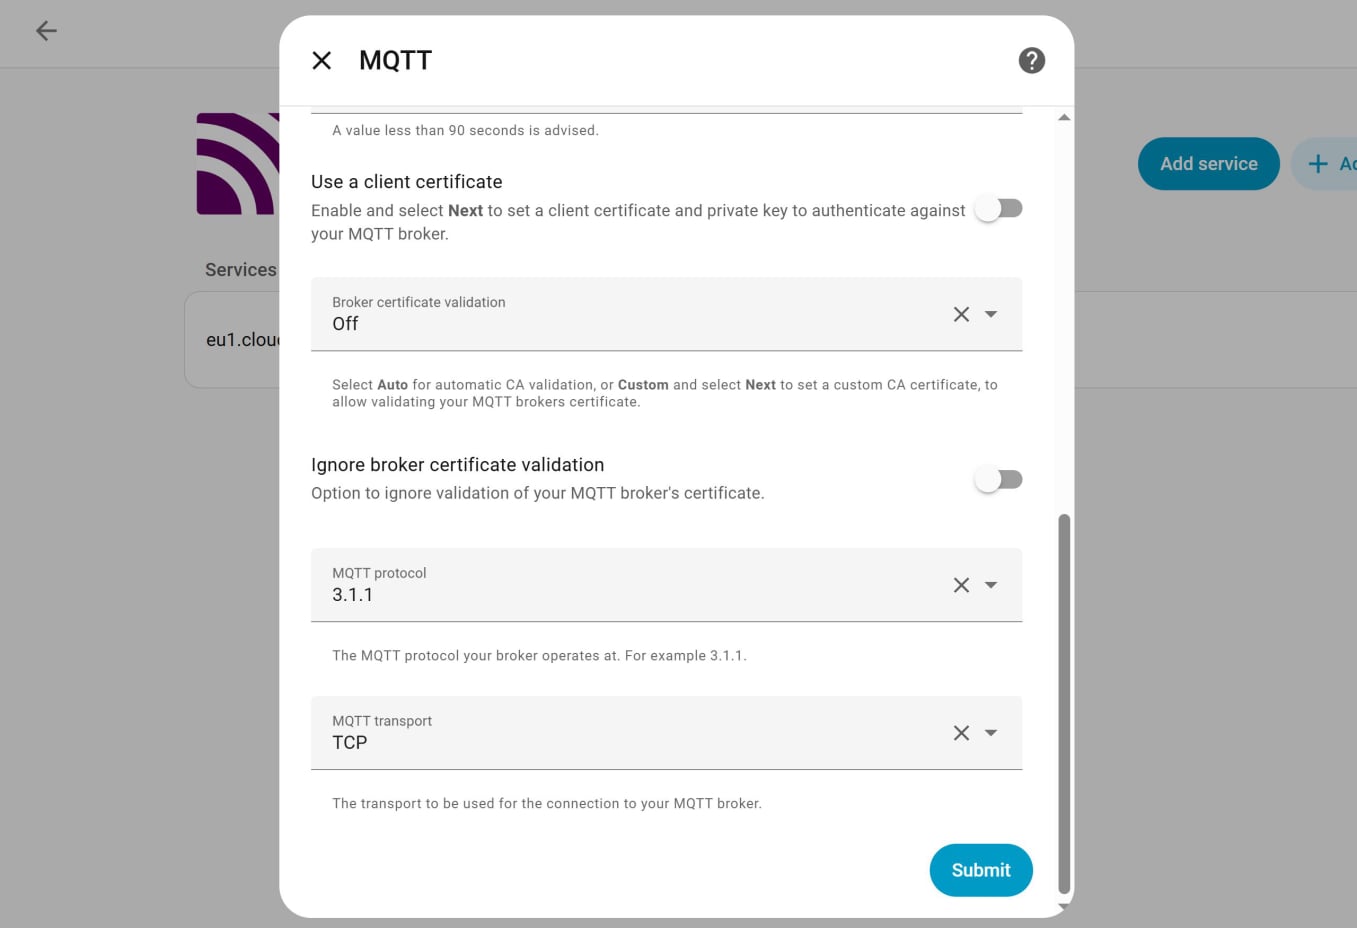
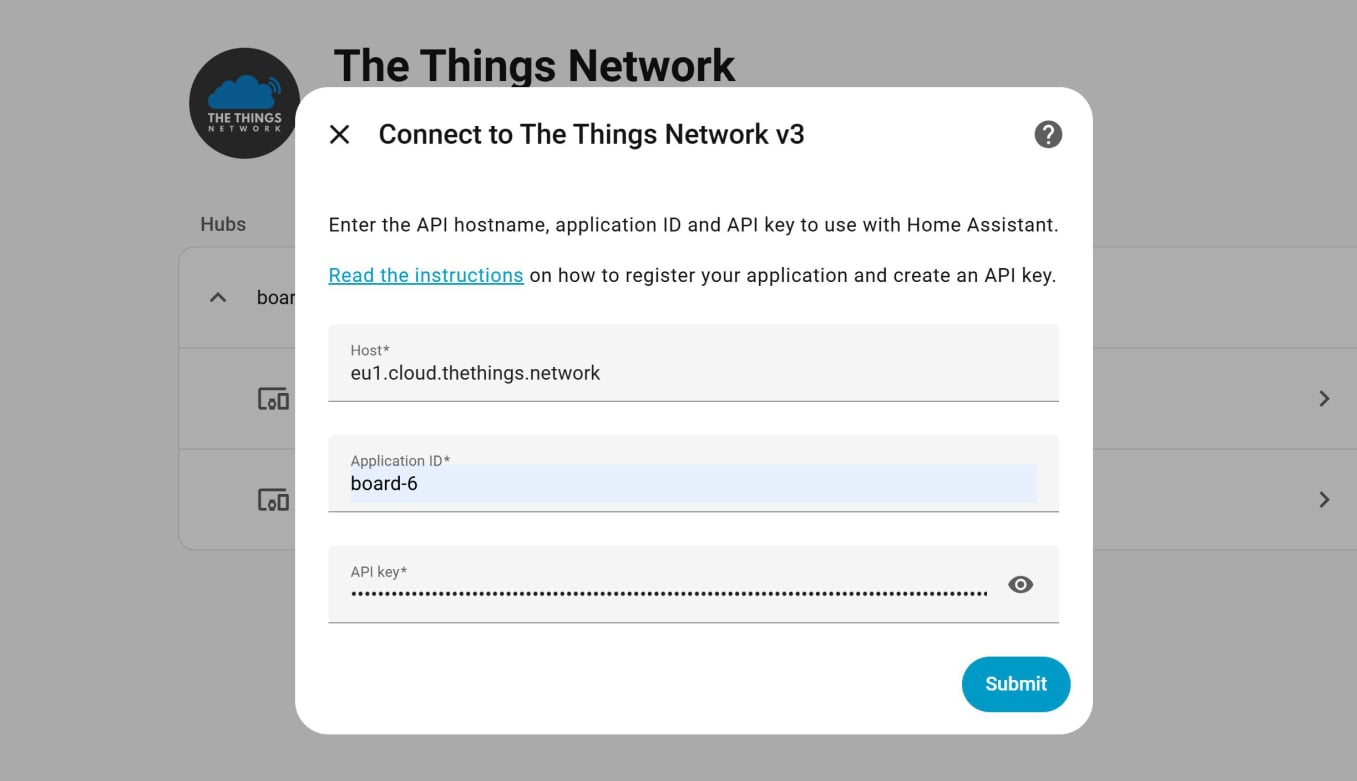
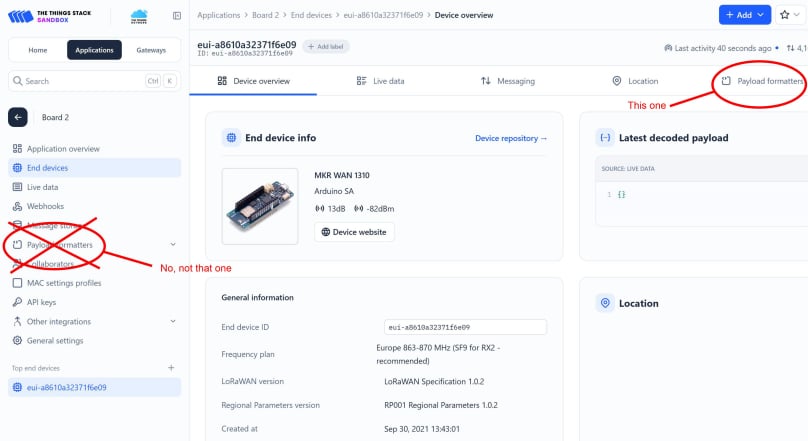
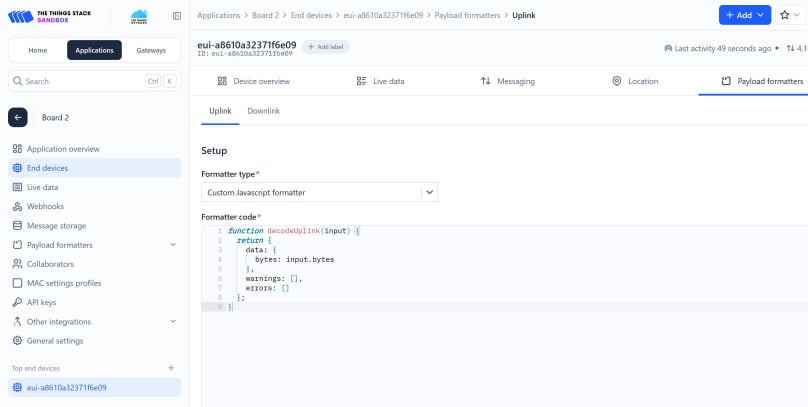
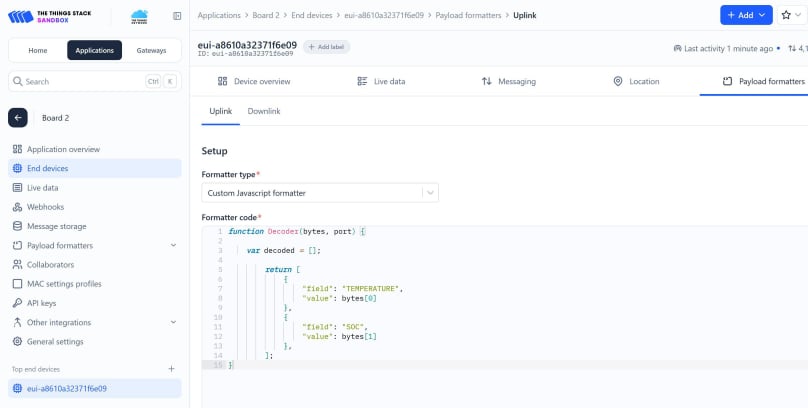
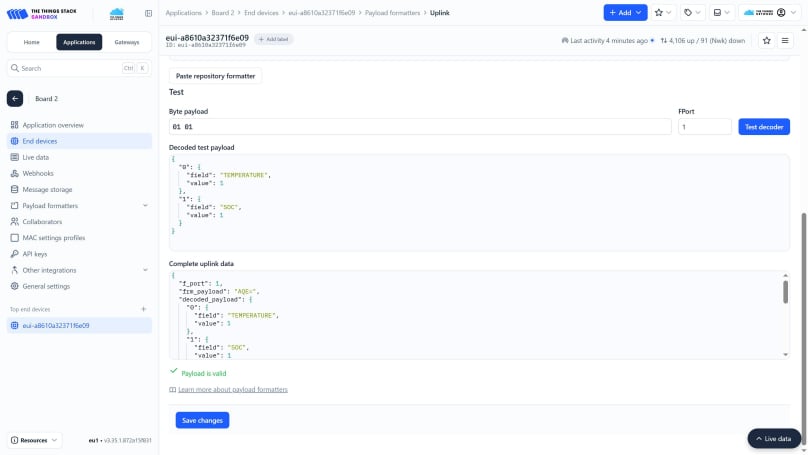
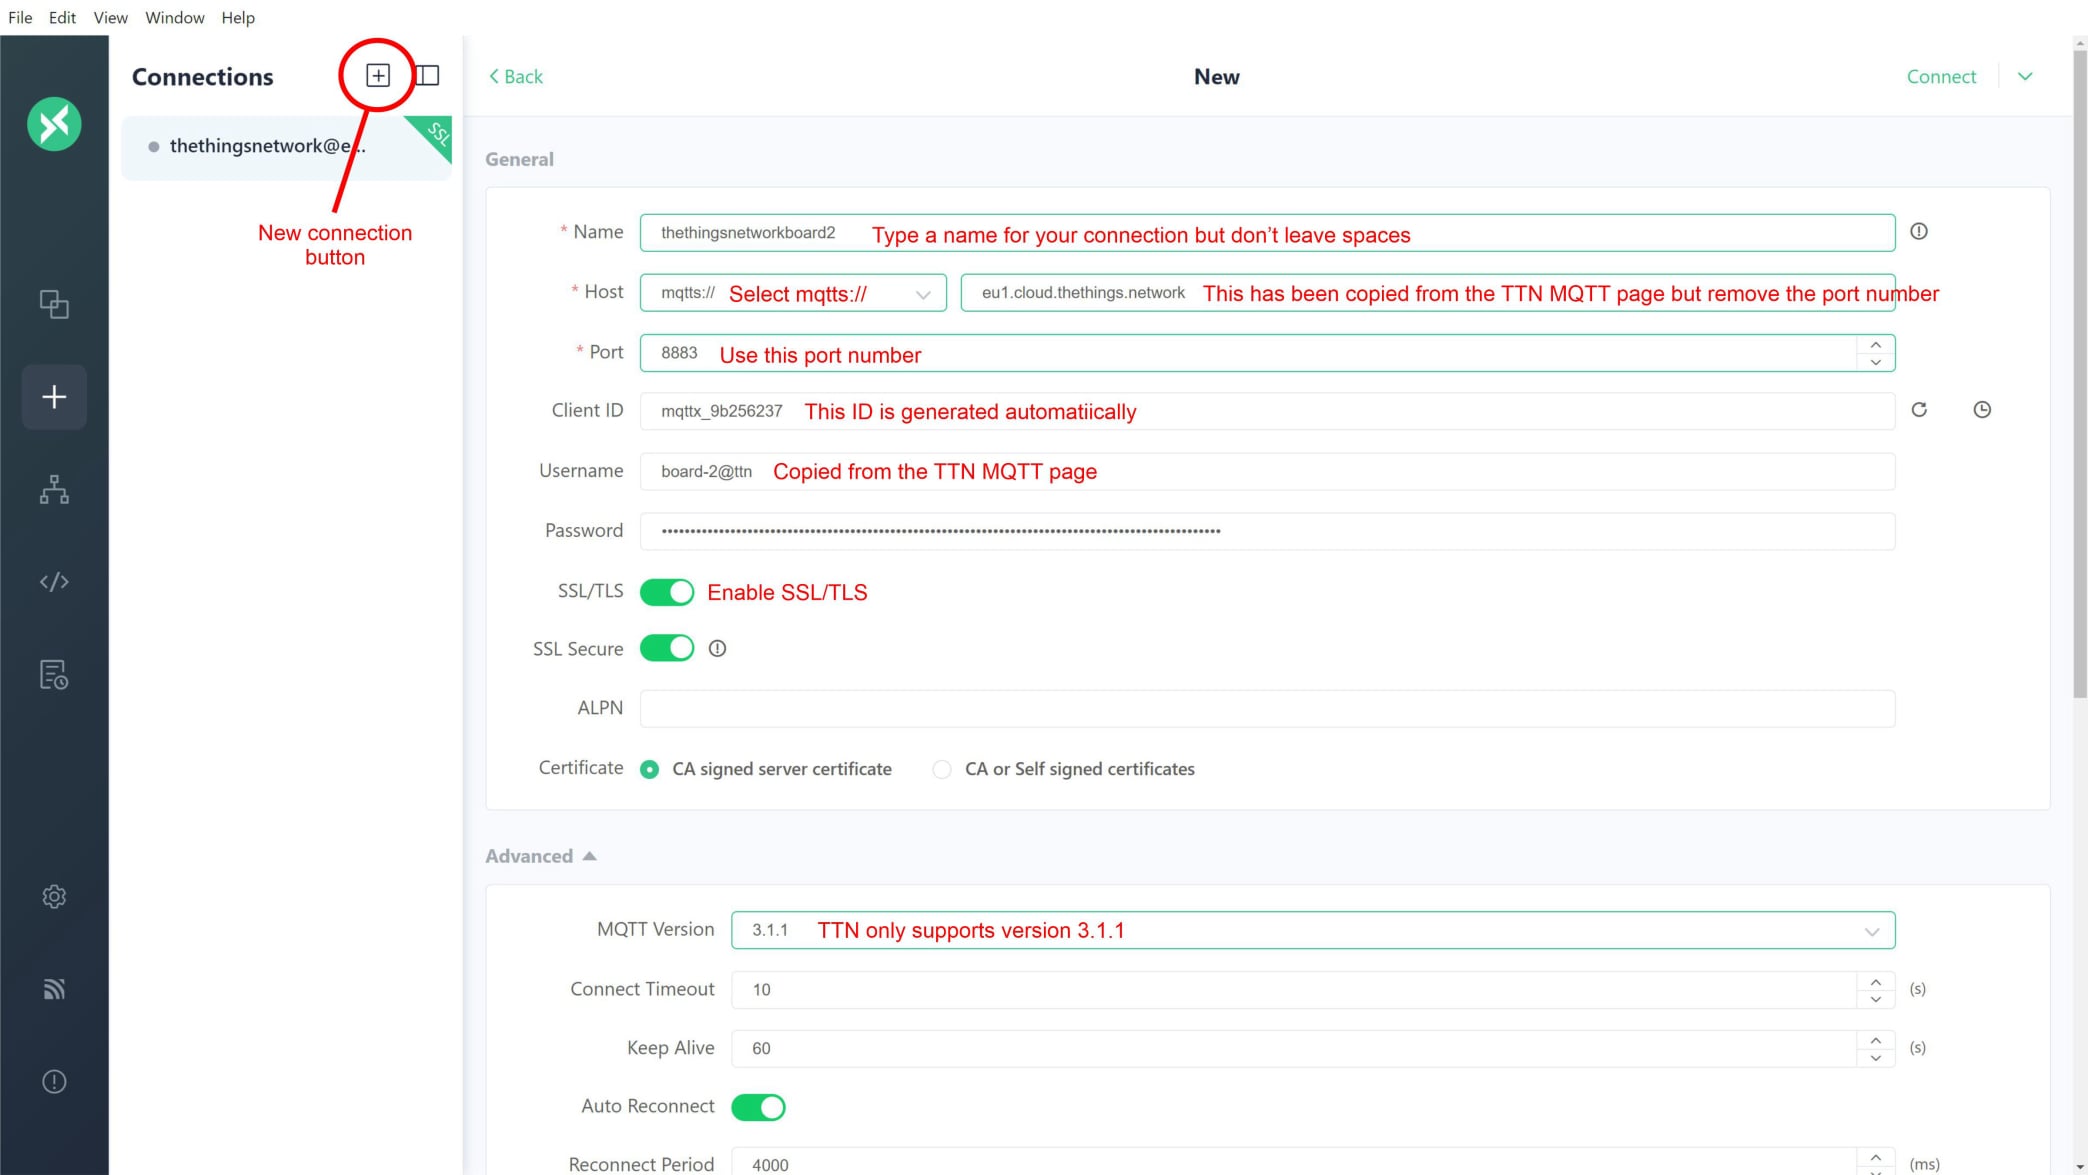
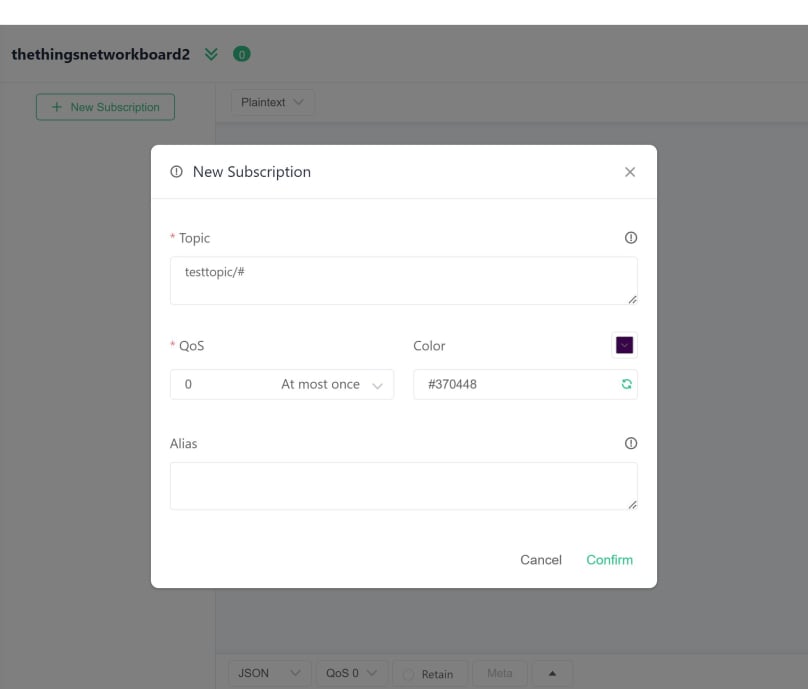
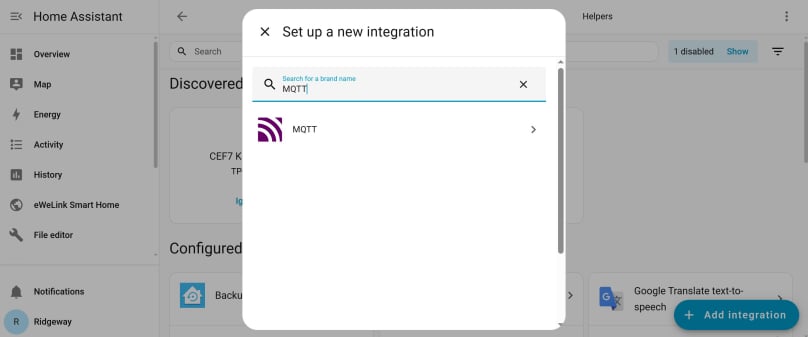
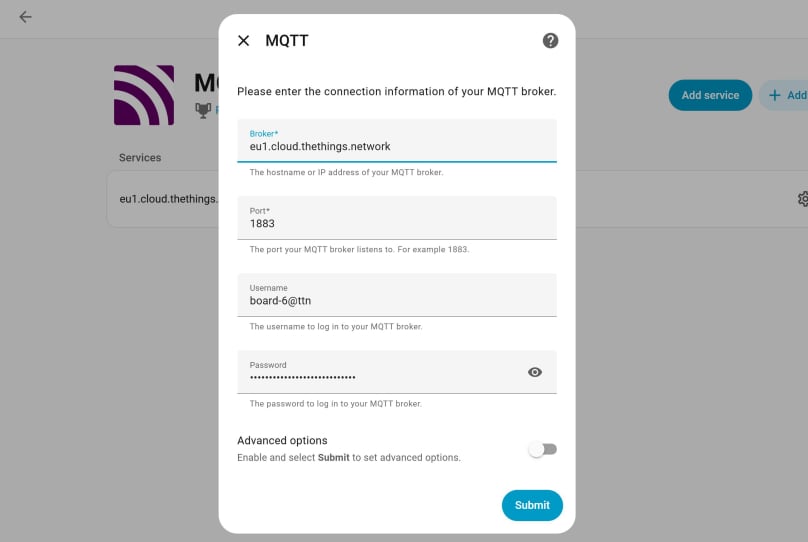
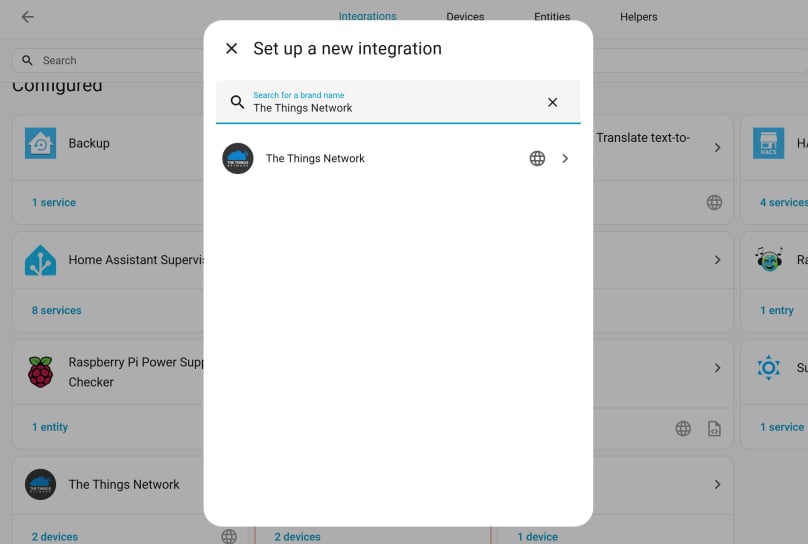
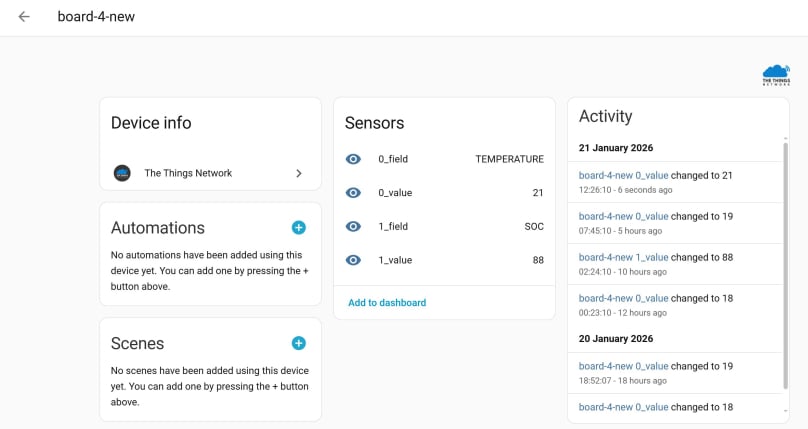
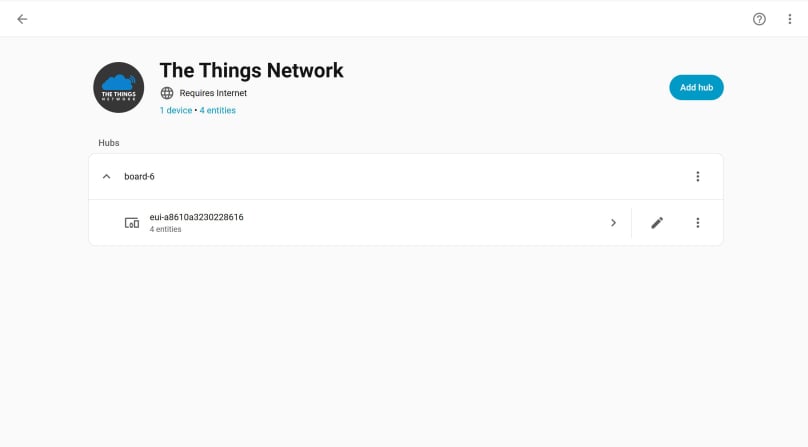
That’s where LoRa becomes useful. In this tutorial, we’ll connect a popular smart home platform, in this case Home Assistant, to your LoRa network using MQTT, giving you long range, low power monitoring far beyond the reach of Wi Fi. 

Integrating your LoRa sensors with Home Assistant using MQTT

If you have been following the previous tutorials, you should be all set to proceed with this integration.

If you are curious, MQTT stands for Message Queuing Telemetry Transport. 

Aims

  • By integrating our sensors with Home Assistant, we will be able to carry out actions based on the received data from remote sensors.

Research

Home Assistant Screen Shot

Equipment

You will need to have a sensor set up which is already connected to The Things Network. And a running copy of Home Assistant.

I will by using Board 4, which collects temperature and battery state of charge data. This is already integrated with TTN.

For testing purposes you will need an MQTT client, such as MQTTX: Visit mqttx.app.

Procedure

Enable TTN to MQTT integration and create a password

In this case, the password is actually an API key generated in The Things Network. Login to your TTN console and select your application. 

Connect device to MQTT

Then navigate to ‘Other integrations’, then ‘MQTT’.

This page holds the connection information you will need to connect to Home Assistant, and to your MQTTX testing client. But first you need to generate an API key, which will serve as your password. 


MQTT home page

So, click on the ‘Generate new API key’ link.The key is generated automatically, together with the appropriate rights to export MQTT data.


Generate API key

Once you have copied the API key, paste it somewhere where you can find it again, as this is now your MQTT password for this device. If you do lose it, you can always generate a new one.


Payload formatters

We next need to configure the payload formatters so we can send data from TTN to Home Assistant. In your TTN console, return to your device page, and select ‘Payload formatters’ from the tab at the top of the page. Confusingly, there is also a payload formatters link in the left-hand navigation, but for this to work, we need the tab. (The link in the left-hand navigation is for the application, while the link in the tab is for this end device.)


JavaScript formatter

Once you have clicked the link, select ‘Custom JavaScript formatter’.

You will see that there is already some default code in place. We need to change this to send our temperature and battery’s state of charge data. 


Overwrite the code with this:

function Decoder(bytes, port) {
    var decoded = [];
        return [
            {
            "field": "TEMPERATURE",
            "value": bytes[0]
            },
            {
            "field": "SOC",
            "value": bytes[1]
        },
    ];

New JavaScript formatter

The JavaScript formatter should now look like this.

If you scroll down the page, you can test the code.

Test formatter code

Here, I have input ’01 01’ into the ‘Byte payload’ box and then clicked the blue ‘Test decoder’ button. This equates to 1 degree centigrade and 1 percent state of charge, but in hexadecimal code.

You can see the output in the boxes below the box where you inserted the hexadecimal code.

Now click the blue ‘Save changes’ button.


Test your integration using MQTTX

First, a quick word about ‘publishing’ and ‘subscribing’. In the world of MQTT, a network server routes messages between connected devices using the MQTT protocol. Such a server is known as a broker (in our case, it is the TTN platform). When the broker sends data, it is said to ‘publish’ the data. In order to receive that data, an MQTT client (such as the MQTTQ client we are using, and eventually Home Assistant) has to ‘subscribe’ to the service. In order to subscribe, we need to know the ‘application id’, the ‘tenant id’ and the ‘device id’ of your device. This has the format:

v3/{application id}@{tenant id}/devices/{device id}/up

The ‘application id’ is the name of your device, in this case, ‘board-4’
The ‘tenant id’ is just ‘ttn’.
The ‘device id’ is the ‘end device id’ from ttn, e.g. eui-a861jf64h371f6e09

We can now use this information to populate the fields in MQTTX.

If you have not already done so, download and install MQTTX: download MQTTX

MQTTX new connection

Open the application and click the ‘New connection’ button. Fill in the form with these details.

Name: type any name for your connection, but don’t leave any spaces.

Host: select ‘mqtts://’ the ‘s’ means it is a secure connection, and then use ‘eu1.cloud.thethings.network’.

Port: use ‘8883’, this is the ‘Public TLS address’ from the TTN MQTT page.

Client ID: this is filled in automatically.

Username: this is the application and tenant ID as copied from the TTN MQTT page.

Password: this is the API key generated and saved from the TTN MQTT page. If you can’t find it, you will have to generate a new one.

SSL/TLS: enable this for security.

MQTT Version: TTN only supports version 3.1.1 so use this.

Leave everything else as the default settings.

Now click the green ‘Connect’ link at the top right of the page. 

MQTTX connect to device

You should see something like this.
 
Now click the green ‘Connect’ button on the right of this screen (yes, again), then click the ‘+ New Subscription’ link to the left of the text box. 

New subscription

You should see this popup.

In the ‘Topic’ box is where we place the details of your ‘application id’, the ‘tenant id’ and the ‘device id’ to complete your subscription. It will look something like this:

v3/board-2@ttn/devices/eui-a8610a3299988616/up

‘v3’ because TTN is now running version 3. ‘/up’ means that the subscription will receive uplinks. You could replace this with ‘/#’, which would receive downlinks and error messages also.

Leave other settings on their defaults.


Response received

Click the green ‘Confirm’ link, and after a while you should receive a response (depending on how often your device sends data). My sensor only uploads data every ten minutes, so I could have up to ten minutes to wait. If all has gone according to plan, you should see something like this.

As you can see, we get everything back from TTN. I have highlighted the temperature data in blue, so you can see that it is in there somewhere.

Integration with Home Assistant

Now that we have MQTT working, we can set it up on Home Assistant. Go to your local computer, open Home Assistant and navigate to ‘Settings’, then ‘Devices and Services’. Now click ‘Add integration’, that’s the big blue button at the bottom right. In the popup box that appears, type ‘MQTT’ into the ‘Search for a brand name’ box.

Set up new integration

You should now see only one option. Click on the MQTT icon. You may be taken to a second screen, where you have to click the top MQTT option again. Now click to install MQTT.


Integrations page

You should now see that the MQTT integration has been added to the Home Assistant integrations page.

Add MQTT service

You can see that this form has already been filled in. These are the same details that we used in the MQTTX application to test our connection to TTN. The only difference is that we are using port number 1883, as the application in Home Assistant does not support SSL/TLS. At the foot of the form, toggle on ‘Advanced options’ and click the blue ‘Submit’ button.

Click advanced options

Here you will have to select 3.1.1 in the MQTT protocol box, as this is the only protocol supported by Home Assistant. Leave everything else as is. Click the blue ‘Submit’ button and your instance of Home Assistant should connect to TTN.

Set up TTN integration

Home Assistant also has an integration for The Things Network. In Home Assistant, return to ‘Devices and Services’ and click ‘Add integration’. This time, search for ‘The Things Network’.

Connect to The Things Network

Click on the only option that comes up and you should see this popup.

The ‘Host’ box should be prefilled. Now enter your Application ID and API key from TTN. These are the details from your TTN application and not from your MQTT integration.

Click the blue ‘Submit’ button, and the new integration should appear in Integrations page. From this page click on the TTN integration you have just created and you should see the TTN application that you have just added. You should also see the names of any sensors that have already been added to this TTN application.

Connected to The Things Network

Click on the name of your end device, in this case it is the end device ID, and you will go to the end device home page.

Connected to The Things Network

Click on the name of your end device, in this case it is the end device ID, and you will go to the end device home page.

End device home page

Here you can see that Home Assistant is now displaying the temperature and battery state of charge from you device. Using this information, you can now set up automations in Home Assistant, such as turning a heater on or off.

Up to this point, we’ve been creating a separate TTN application for each end device. That works fine for testing, but it becomes a problem when you want to bring multiple devices into Home Assistant. Home Assistant can only connect to one TTN application via MQTT.

To make multiple devices available in Home Assistant, the solution is simple: add all of your end devices to the same TTN application. Click here to find out how.

© Copyright 2025 Dr Dulcamara - All Rights Reserved